Smart Tools for Easier Buying: Leveraging Our Custom Website Tools
December 12, 2023
Are you using Book Depot’s website tools to their fullest capabilities? We’ve made the book buying process so much easier for our customers through the creation of custom tools to help them search for the books they want. Gone are the days of having to painstakingly type in authors one-by-one and juggling multiple keywords to uncover books in line with customers’ interests.
With our Custom List Creator, you set the criteria. This tool empowers you to tailor lists according to your specific needs and preferences. Save your customized lists for future use, set up templates to have them emailed to you, and choose both the day and frequency for receiving these lists. Doesn’t that sound like a time-saver?
Moreover, enhance your experience by applying advanced filters. Precision is at your fingertips as you refine results by quantity, concentrate on budget-friendly price points, identify in-stock arrival dates, specify preferred publishers, and eliminate redundancy by excluding previously viewed lists.
Curious about this tool’s secret hideout? After logging in, just click the person icon at the top, then navigate to My Lists. Click ‘Create,’ and voila! You can customize your list across various categories including:
Category
Publisher
Author
Format
Price & Quantity
Arrival Date
Demographic
Keywords
Exclude Lists
At Book Depot, we’re not just about offering an extensive book selection at great prices; we’re on a mission to make your shopping smarter, so you can maximize your resources. Say hello to efficiency with tools that put convenience at your fingertips.
Sidebar
Custom List Tool: Refine Your Custom Lists
March 3, 2019
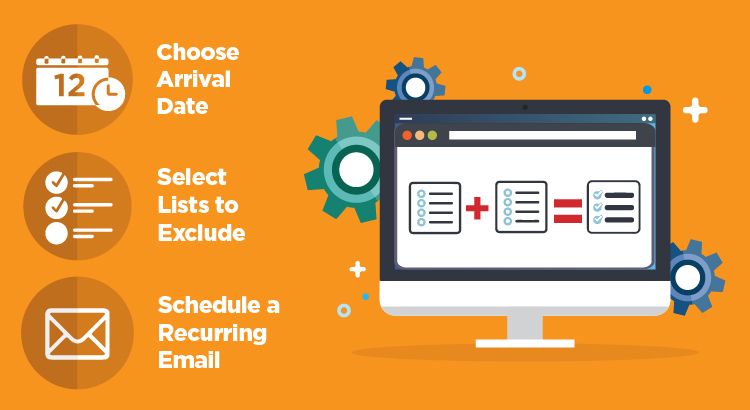
When you are using the Custom List tool, the Arrival Date and Exclude Lists attributes can work hand-in-hand to help you refine your lists and are very valuable tools when you are looking for the latest product. Sure, you can scan our New Arrivals list every couple of days like many of our customers do, but with this new tool you can do so much more—you can set additional parameters around the newest products, filter out any features you don’t want, and even schedule your list so it is emailed to you at the frequency of your choosing.
Video Tutorial
Here are brief video tutorials to show you how to refine your custom lists:
Arrival Dates:
List Exclusions:
Step-by-Step Instructions
To demonstrate how to use the Arrival Date and Exclude Lists filters, let’s walk through an example.
START
For the purpose of this example, we will create a list of new biography and autobiography titles that can be regularly emailed at a desired frequency. To start, select Category, Arrival Date, and Exclude Lists from the list of attributes on the Start page. Click Next to move forward to the Category page.
CATEGORY
On the Category page, select Biography & Autobiography from the list of categories and then click Next to move ahead to Arrival Date page.
ARRIVAL DATE
On the Arrival Date page, you have the ability to select a date range for when new products have become available for sale. Your options include:
Anytime
1 Day
1 Week
2 Weeks
1 Month
2 Months
3 Months
If none of these options are the right fit for you, you can also select Other, which allows you to set your own date using the calendar. For this example, we will select 1 Week. This means that the list will only include new biography and autobiography titles that came into inventory within the past week. Once you have made the selection, click Next to move to the Exclude Lists page.
EXCLUDE LISTS
The Exclude Lists attribute is one more feature that gives you better control of our inventory and helps you manage the size of your lists. Since Book Depot can regularly receive returns from the same publisher and because we are sorting more product on a daily basis than ever before, there is a fair bit of title duplication over a period of time within our new arrivals. However, the Exclude Lists attribute gives you the option to prevent any titles from your previous lists from appearing on the current list you are creating. More specifically, you can exclude lists from the following tabs:
My Lists
Custom Lists
From Sales Rep
Templates
For each of these options, you can also exclude titles based on a set time span or date. Your date-related exclusion options are:
Weeks (#)
Months (#)
Years (#)
Calendar Date
Continuing our example, to ensure your list does not include any books that have appeared in your previous lists for the past month, you can check the Exclude box next to the lists and select Time Span – 1 Month. This will effectively trim down your list to the newest titles and remove any duplicate titles you have seen recently.
REPORT FIELDS
The Report Fields page allows you to select the information you would like to be included in your downloadable Excel spreadsheet list. We have preselected several for you, but you can alter these options to whatever you prefer. You can even include the cover image, but please note that if your list exceeds 1,000 titles, the images will not appear due to file size constraints. When you are satisfied with your selections, you can continue to the final step by clicking Next.
FINALIZE
On the Finalize page, you have the ability to take your list and template it, and then schedule an email so you are automatically notified at the frequency of your choosing. The first thing you will want to do is name your list. Next, click the checkbox beside Create as template. Once you check that box, a new menu of options will pop up that will allow you to choose how often and for how long your list is emailed to you.
Recurrence Pattern
The Recurrence Pattern is where you will select the regular frequency of the email—weekly, monthly, or yearly. For this example, if we give this list a weekly recurrence pattern, you can then select which day of the week you will receive the list (e.g. if Monday is selected, every Monday you will receive a list of newly-added biography and autobiography titles from the past week from Book Depot’s inventory).
Email Notification
The Email Notification section allows you to specify the email address(es) your list will be sent to as well as customize the email message itself. The default email address is the one that is associated with your account. However, if you would like to replace your default email address with a different one, you can do so by clicking the small “x” on the right-hand side of the blue button. You can also add additional email addresses if you would like others on your team to receive these regular lists. As for the messaging, we have a default subject line as well as a blank body paragraph that will populate once the email is sent, but you can change and/or add any other information you would like.
Create
Now that you have entered all of your preferences, you are ready to click the green Create button. By clicking Create, you have officially saved your template and scheduled your recurring email!
QUESTIONS?
If you have any questions about this tool or any other functions of our Custom List tool, please contact us!
Categories may be an area where you wouldn’t think you would need a tool to assist you in browsing our online book selection. We already include a list of categories on the side bar of our pages that easily filters the list of titles—what could be easier?
What the website does not currently offer, however, is the ability to compile as many categories and subjects as you desire into one list, which makes the category selection tool extremely valuable! For example, if you have a store that specializes in science fiction books, you would need to go to the Fiction category on the website and select the Science Fiction subject (and maybe Fantasy as well). However, this filtering would only include adult titles. You may also be interested in young adult and tween science fiction titles so then you would head to the Young Adult Fiction category and select the Sci-Fi subject, followed by a look through the Tween category with the Sci-Fi subject as well. By doing this, browsing the titles that you are interested in can become a tedious process. Here is where the Category/Subject List Tool is going to save you time and allow you to generate all the titles that are of interest to you.
Through this example, you can start to see how useful this tool really is! For further flexibility, once you have created a list that includes all of your interests you also have the ability to save it all into a single template and have that delivered to your inbox as often as you like. Now that is a timesaving tool!
Video Tutorial
Here is a brief video tutorial to show you how to use this tool:
Step-by-Step Instructions
Once you are logged into your account, you can find our Custom List tool under the profile icon at the top of the webpage in My Lists (or by clicking here). When you get to the page, you may notice that you already have a list or two already created. These are example lists we have created for you to help get you started and to aid your browsing experience.
GETTING STARTED
To create a Category list, start by clicking on Create. You will see a list of several attributes that you can create a list from. For the purpose of this tutorial, check the box next to Category and select Next to proceed to the next page.
CATEGORY
On the Category page, you are first presented with many category options. Once a category is selected, the corresponding subject options will appear. From there you have the ability to select as many categories and subjects as you would like!
Let’s walk through the example presented at the beginning of this tutorial to demonstrate how exactly this tool works. Start by clicking on Fiction under the list of categories. Once selected, a second list of options appear that display all the subjects under the category that was selected. Travel down the list and select the subjects of interest or click Select All if you would like to proceed with the entire list of subjects available.
For the purpose of this example, we only want a couple of the subjects under fiction, so we will select Science Fiction and Fantasy as our subjects. As you select your subjects you will see a number at the top increase, displaying how many subjects are selected. From here we can continue the same process with additional categories. Again, to follow through on this specific example, we will select Tween Fiction as the category and then Sci-Fi as the subject. Finally, we will select Young Adult Fiction as the category and then Sci-Fi as the subject. Now that this list covers three different categories and a few subjects, let’s move onto the next page.
REPORT FIELDS
On the Report Fields page, you have the ability to select the information you would like included in your downloadable Excel spreadsheet list. We have preselected several for you but you can alter these options to whichever you prefer. You even have the option to include the cover image, but please note that if your list exceeds 1,000 titles, the images will not appear due to file size constraints. When you are satisfied with your selections you can continue to the final step by clicking Next.
FINALIZE
On this last page, you will finalize your list and then move it to a shoppable format or create a template from the list and schedule it to be delivered to you by email. The Review section gives you the ability to make any last-minute changes to any of the attributes that make up your list. Since we only selected Category for this list, all the other attributes listed should have All included or No filters applied listed. The only attribute that will be impacted from this tutorial is Category & Subjects, and that will specify how many categories and subjects you selected.
The Name section is your next step, where you simply need to name your list. Once you have done that, you have the option to create a template by checking the box beside Create as template. If you choose to create the template, a scheduling program will appear that gives you several options including frequency of recurrence (weekly, monthly, yearly), start and end dates, day of the week, etc. You need to include the email address(es) that you want to send to list to, and you can also create a subject and message for that email to remind you of what you are receiving. Whether you choose to create a template or not, you must finalize the list by clicking on the green Create button at the bottom of the page.
TEMPLATES
If you decided to just create a list and not make it into a template, you will see a pop-up to either view the list on our site using a special viewing page which allows you to add items to your cart, or to download the list to an Excel spreadsheet.
If you chose to create a template, you will see that list under My Templates. To view it immediately, you need to select Create Now and that list will be moved over to My Lists. By doing so, you now have the ability to open it on the custom view page on the site, or you can also download it to an Excel spreadsheet under Actions.
QUESTIONS?
If you have any questions about this tool or any other functions of our Custom List tool, please contact us!
Have you ever found yourself searching keyword variation after keyword variation to see all of the books available about a certain topic? The time has come where that manual (and no doubt tedious) process is no longer needed!
With Book Depot’s new Custom List tool, we have created a very easy way for you to search your keywords in our list generator. Now you have the ability to enter multiple keywords at one time and receive an immediate list of all the results where the keywords appear in the title and/or overview! For example, if you are interested in a list of keywords that is pertinent to your location, you may be searching for words related to the city, state, province, and/or country as well as any significant terms tied to your surrounding landmarks or geographical features. Now you can take all those keywords, compile them into one list, and search that against our entire inventory to find books that will be important to your business.
What’s even better is that once your list is created, you can refer back to it as often as you want or even create a template to have that list emailed to you at the frequency of your choosing.
Video Tutorial
Here is a brief video tutorial to show you how to use this tool:
Step-by-Step Instructions
Once you are logged into your account, you can find our Custom List tool under the profile icon at the top of the webpage in My Lists (or by clicking here). When you get to the page, you may notice that you already have a list or two already created. These are example lists we have created for you to help get you started and to aid your browsing experience.
GETTING STARTED
To create a Keyword list, start by clicking on Create. You will see a list of several attributes that you can create a list from. For the purpose of this tutorial, check the box next to Keywords and select Next to proceed to the next page.
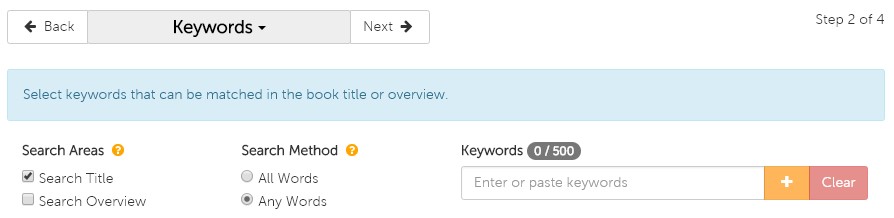
KEYWORDS
On the Keyword page, you are presented with a couple options before you begin your search—Search Areas and Search Method.
Search Areas
Search Areas determines which fields are included in the search. Under Search Areas, you are given three options:
Search Title: search for your keywords in only book titles
Search Overview: search for your keywords in only book overviews
Both (check the boxes beside both Search Title and Search Overview): search for your keywords in both book titles and overviews
The default is set to search titles only but if you would like a more comprehensive search, we recommend you select both.
Search Method
Search Method determines how exact you would like the list generator to be when populating your list. Under Search Method, you are given two options:
All Words: the search will look for results that include all keywords that are entered (e.g. if you were to enter 10 keywords, only results that include all 10 will be populated)
Any Words: the search will look for results that include any of the keywords that are entered
The default is set to search any words, which will be most commonly used.
Now it’s time to add your keywords! You can either type them in one by one and click the symbol after typing each keyword, or if you have a list already created in a text file or Excel spreadsheet, you can copy and paste that into the search bar. You can see how many words you have added on the counter just above the search bar, where you will be capped at 500.
REPORT FIELDS
On the Report Fields page, you have the ability to select the information you would like included in your downloadable Excel spreadsheet list. We have preselected several for you but you can alter these options to whatever you prefer. You even have the option to include the cover image, but please note that if your list exceeds 1,000 titles, the images will not appear due to file size constraints. When you are satisfied with your selections you can continue to the final step by clicking Next.
FINALIZE
On this last page, you will finalize your list and then move it to a shoppable format or create a template from the list and schedule it to be delivered to your email. The Review section gives you the ability to make any last-minute changes to any of the attributes that make up your list. Since we only selected Keywords for this list, all the other attributes listed should have All included or No filters applied listed. The only attribute that will be impacted from this tutorial is Keywords, and that will specify how many Keywords you selected.
The Name section is your next step, where you simply need to name your list. Once you have done that, you have the option to create a template by checking the box beside Create as template. If you choose to create the template, a scheduling program will appear that gives you several options including frequency of recurrence (weekly, monthly, yearly), start and end dates, day of the week, etc. You need to include the email address(es) that you want to send to list to, and you can also create a subject and message for that email to remind you of what you are receiving. Whether you choose to create a template or not, you must finalize the list by clicking on the green Create button at the bottom of the page.
If you decided to just create the list and not template it, you will see a pop-up to either view the list on our site using a special viewing page which allows you to add items to your cart, or to download the list to an Excel spreadsheet.
TEMPLATES
If you chose to create a template, you will see that list under My Templates. To view it immediately, you need to select Create Now and that list will be moved over to My Lists. By doing so, you now have the ability to open it on the custom view page on the site, or you can also download it to an Excel spreadsheet under Actions.
If you have any questions about this tool or any other functions of our Custom List tool, please contact us!